A staging Wordpress website is a clone or duplicate of your live Wordpress website that is used for testing changes before making them live. In other words, it’s a copy of your website (usually in a subdomain like test.yourdomain.com) where you can make changes without altering your live website until you deploy them. Staging websites help you fix any unexpected errors so you don't break your live website.
With 2MHost, staging a website is very simple, here is what you need to do:
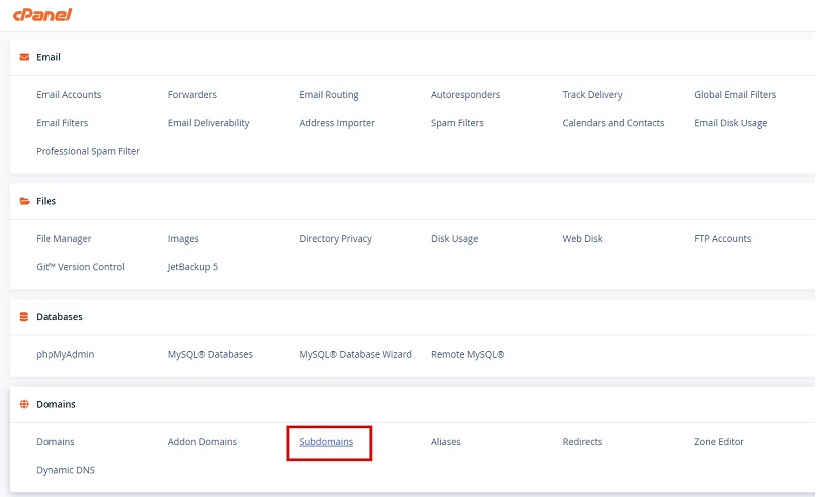
- Use your cPanel to create a staging subdomain, stick to dev.yourdomain.com, staging.yourdomain.com or test.yourdomain.com, in case of using commercial plugins or themes, usually the license will cover these subdomains too.
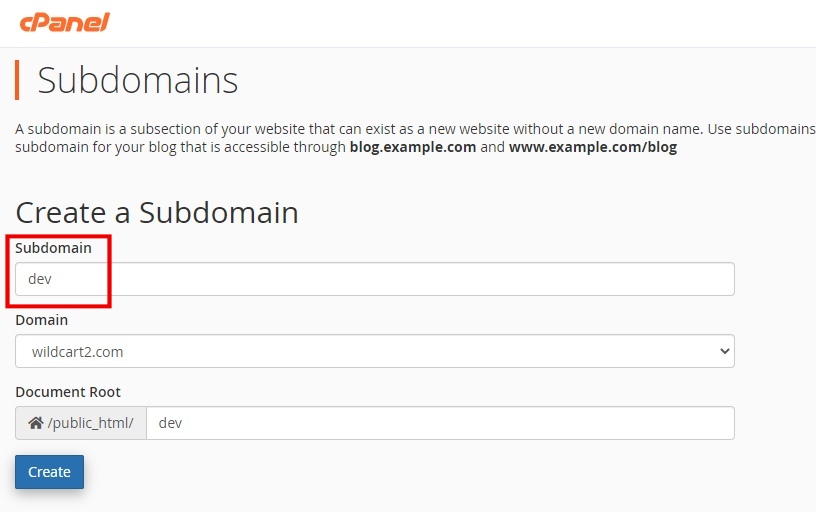
- cPanel will install a new SSL certificate on the created subdomain.
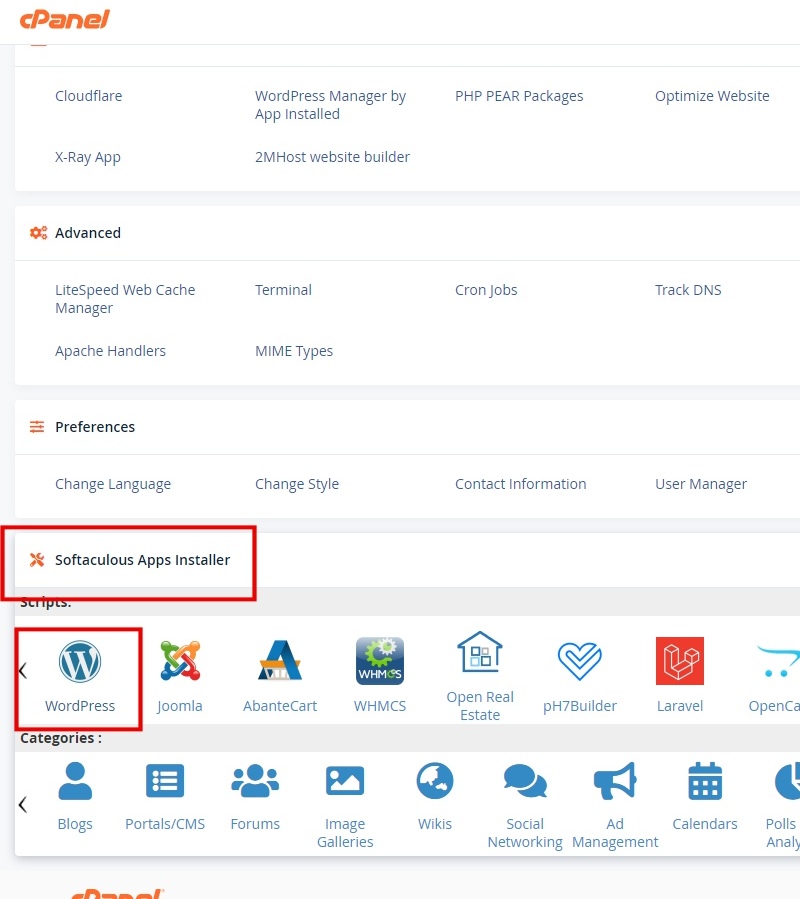
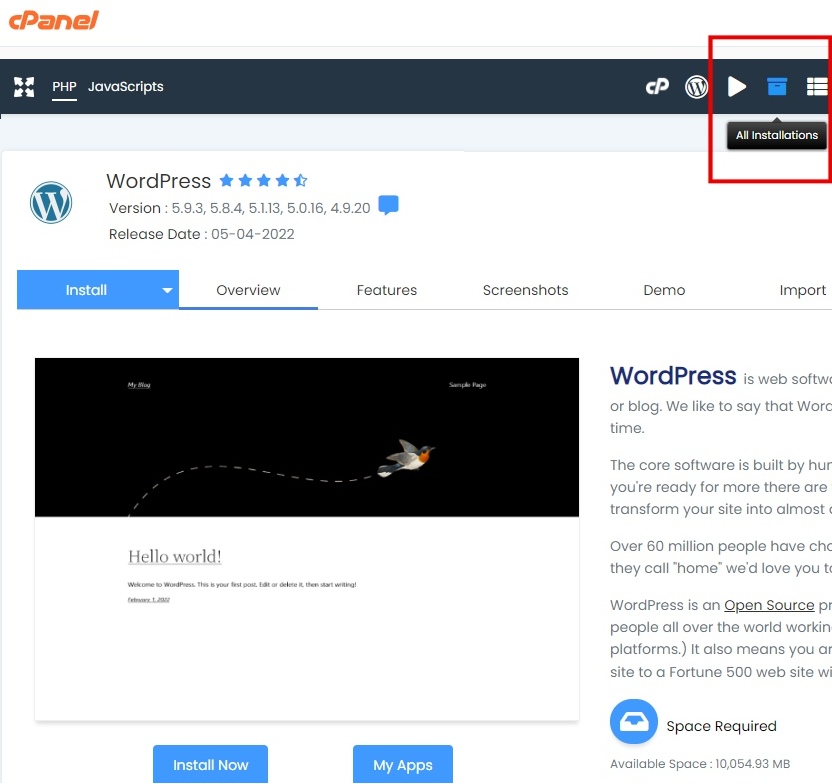
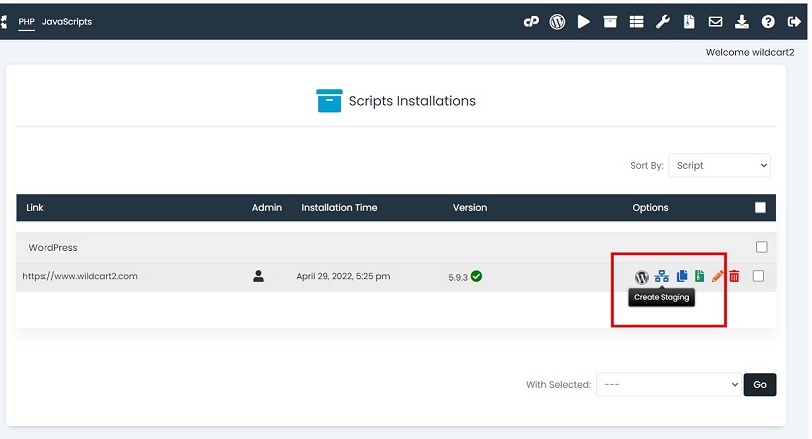
- Back to cPanel home page, scroll down to the Wordpress Icon under 'Softaculous Apps Installer'. Click on the 'All Installation' icon on the top menu and find your live Wordpress installation.
- Click 'Create staging' icon of the live Wordpress.
- Fill in the 'Staging Wordpress' form carefully, for 'Choose Installation URL' field, choose the subdomain you created in the first step.

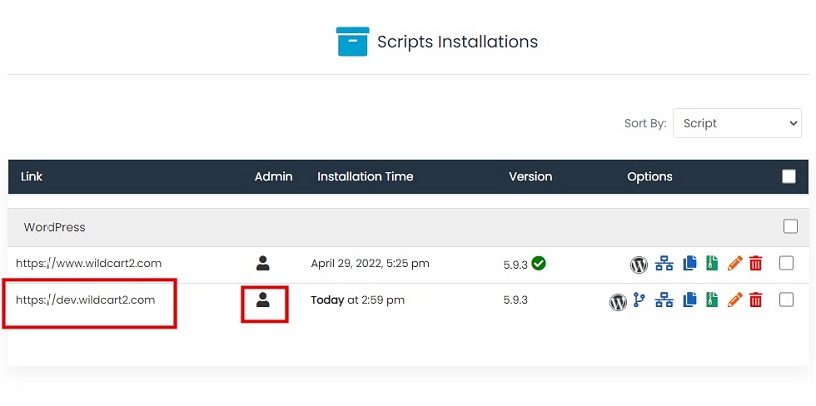
- You are done! an identical copy of your live website is created under the staging subdomain.
- Back to the list of installations, you can now login to the dashboard of the staging Wordpress, perform and test any changes you want.
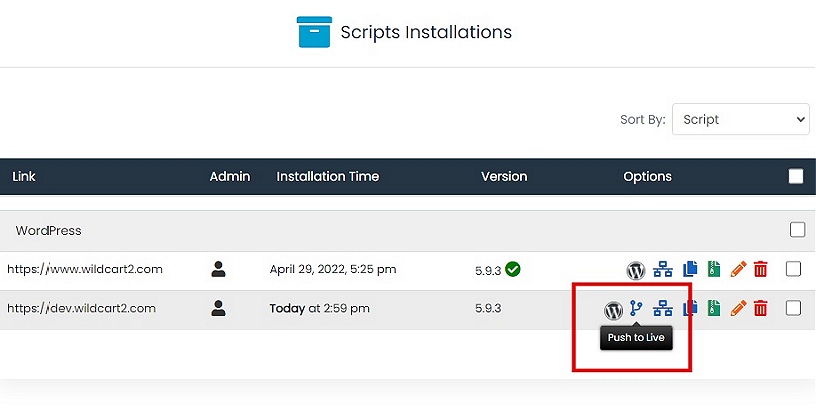
- When ready, click 'Push to live' icon to copy the staging website into the live website.
- If you are using any caching plugin, you may need to flush your cached data to see the changes in the live website.
Last update: Mar 01, 2025 17:09